FPV OpenIPC Thinker Air Unit
OpenIPC Thinker is a compact camera and video transmission unit that easily integrates with various RC devices.
Two versions are available:
- Base (Store) — SD card slot, requires an external Wi-Fi module
- Tiny (Store) — integrated RTL8731BU Wi-Fi module[^1], but without an SD card
RTL8731BU: 50mW @ 5G, 125mW @ 2.4G
Specifications
- SoC SSC338Q
- Power: 2–6S
- Built-in 3A BEC
- MEMS microphone
- Interfaces:
- 3x UART
- 1x MIPI for the camera
- 1x USB for Wi-Fi (5V/3.3V)
- 1x Ethernet
- 1x power
Physical parameters
- Board size: 25×25 mm
- Weight:
- Without heatsink: ~8.8 g
- With heatsink: ~13.4 g
- Holes:
- PCB: 20×20 mm
- With heatsink: 25.5×25.5 mm
- Cooling: aluminium heatsink
Cameras
IMX335 (Store)
- 14×14 mm, aluminium housing
- Lens: 140°, f/2.8
- IMX335 sensor with IMU
IMX415 (Store) — a different sensor with the same hardware
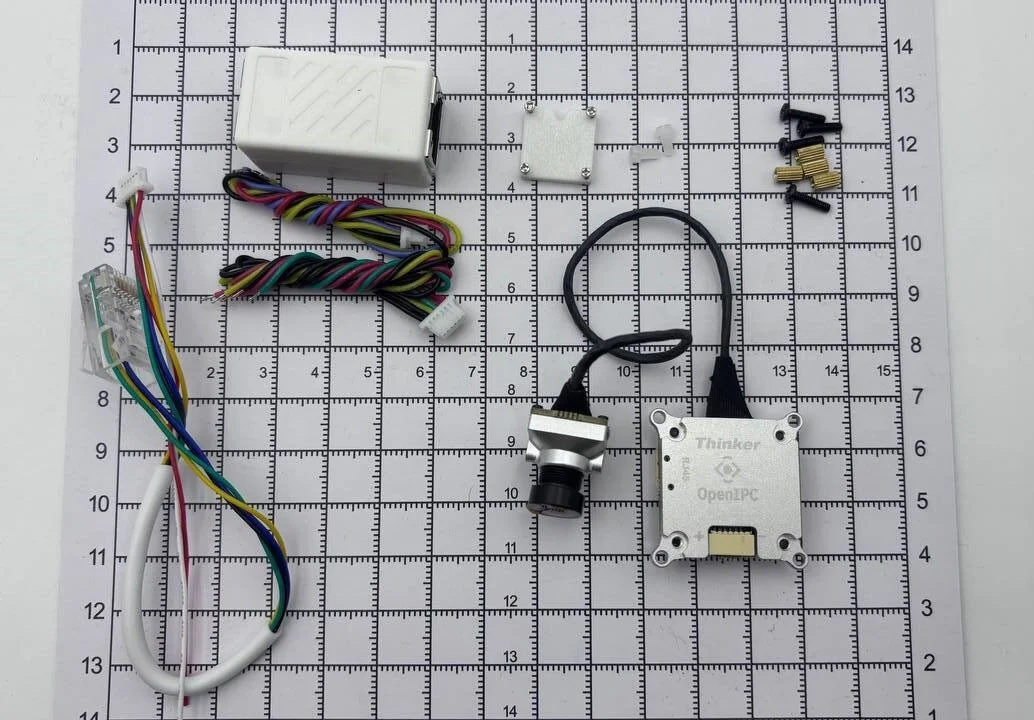
Hardware installation
Connecting power and the flight controller
- Find the 6-wire power/UART (JST) cable: black, black, yellow, green, red, red
- Black — to power minus, red — to plus
- Green → TX, yellow → RX (on the FC)
- TX to RX, RX to TX
- Connect the cable to the power/UART2 connector (the heatsink side)
Connecting the Wi-Fi module (Base version only)
- The Tiny version does not require this step
- Use the USB cable: red (+), blue (D-), yellow (D+), black (GND)
- Connect according to the pinout: GND → GND, red → VCC, yellow → D+, blue → D-
Replacing the camera
- By default an IMX335 is installed
- Remove the heatsink (4 screws), carefully
- Disconnect the camera and connect the new one
- Put the heatsink back (do not remove the thermal pad!)
Ethernet for configuration and updates
- Take the Ethernet cable: 6-pin JST ↔ RJ45
- Connect the JST to Ethernet/UART0 (the side without a heatsink)
- Connect the RJ45 to a PC or router
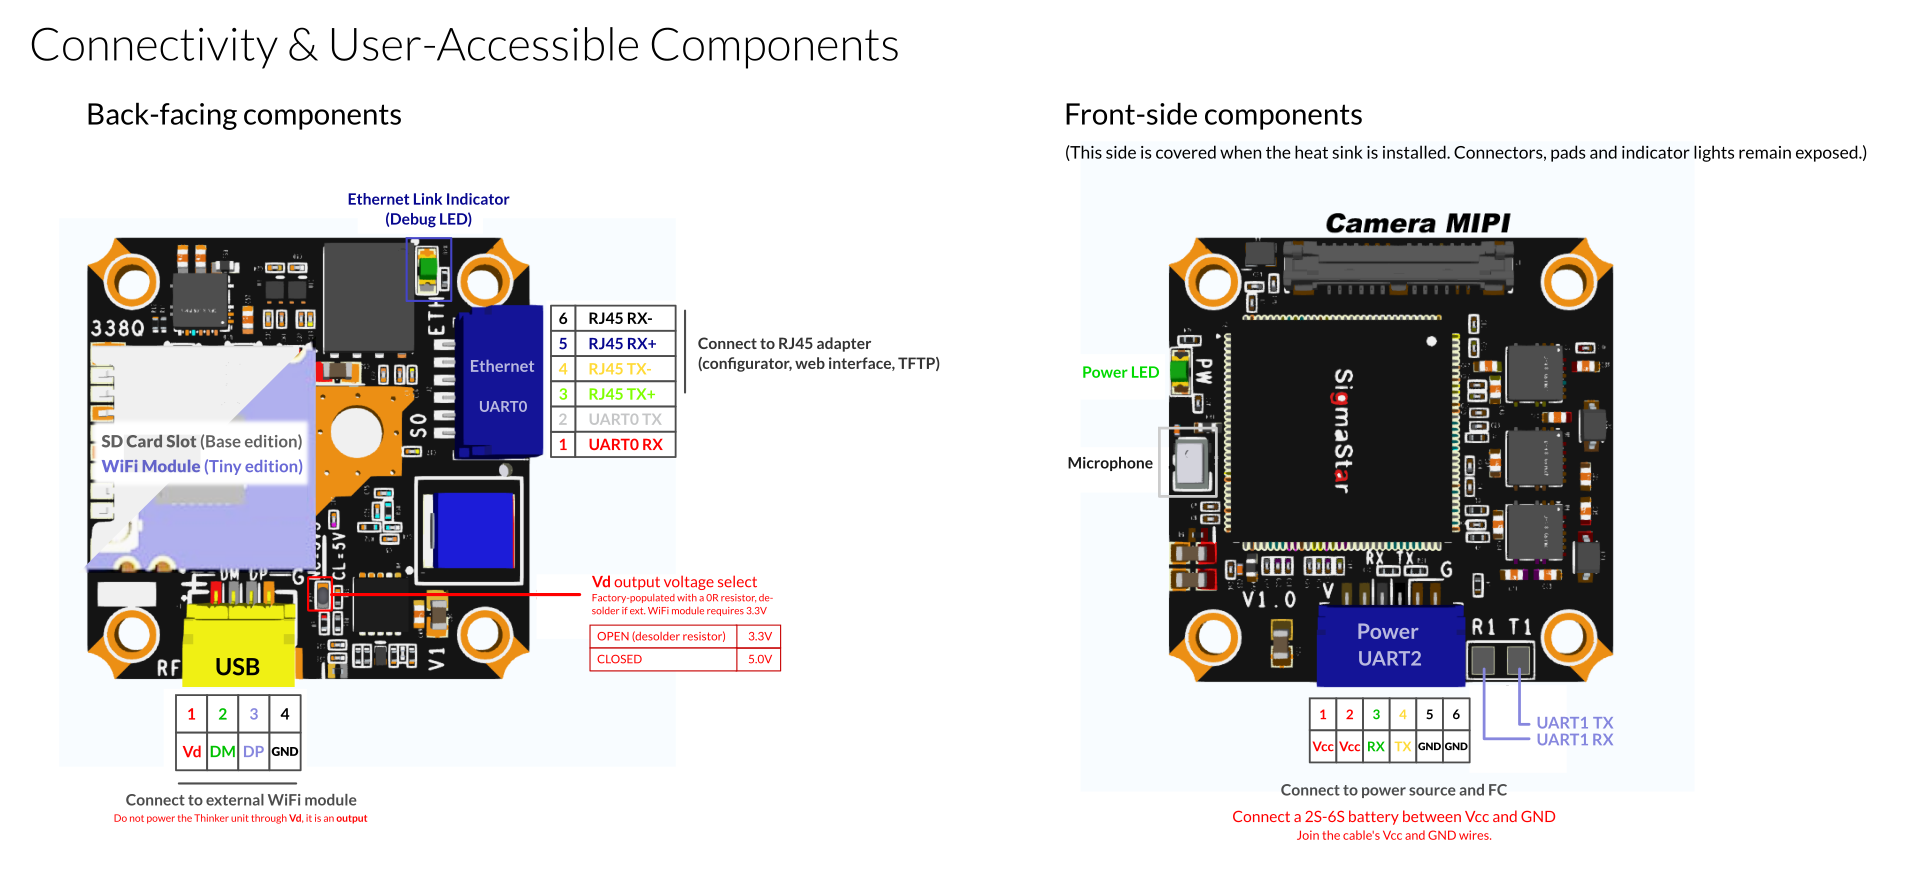
| Section | Pin name | Direction | Description |
|---|---|---|---|
| RJ45 / UART0 Header | UART0 RX | Input | UART0 receive line |
| UART0 TX | Output | UART0 transmit line | |
| RJ45 TX+ | Output | Ethernet transmit TX+ | |
| RJ45 TX- | Output | Ethernet transmit TX- | |
| RJ45 RX+ | Input | Ethernet receive RX+ | |
| RJ45 RX- | Input | Ethernet receive RX- |
Tips
- Do not supply power through USB Vd.
- Do not remove the thermal pad from the heatsink.
- For 3.3V Wi-Fi — remove the voltage-select resistor.
- High-consumption modules can be powered separately.
Software configuration
Accessing the Web UI
- DHCP: connect to the network and find the IP on the router
- Static IP: 192.168.1.10 (manually configure the PC interface)
Default login:
- User:
root- Password:
12345
Firmware update
- Via the Web UI (internet required)
- Via the OpenIPC Configurator
Firmware:
Additional
Use the OpenIPC Configurator