Drone Assembly and Configuration Guide
- Mount the Air Unit in the rear of the drone for VTX.
- Connect the Air Unit to the FC (DJI connector) using the supplied cable from Runcam WifiLink v1/v2.
- Connect to the FC via Type-C, open Betaflight → Ports → UART 2 → ON.
REQUIRED! Under Peripherals → VTX (MSP+DisplayPort).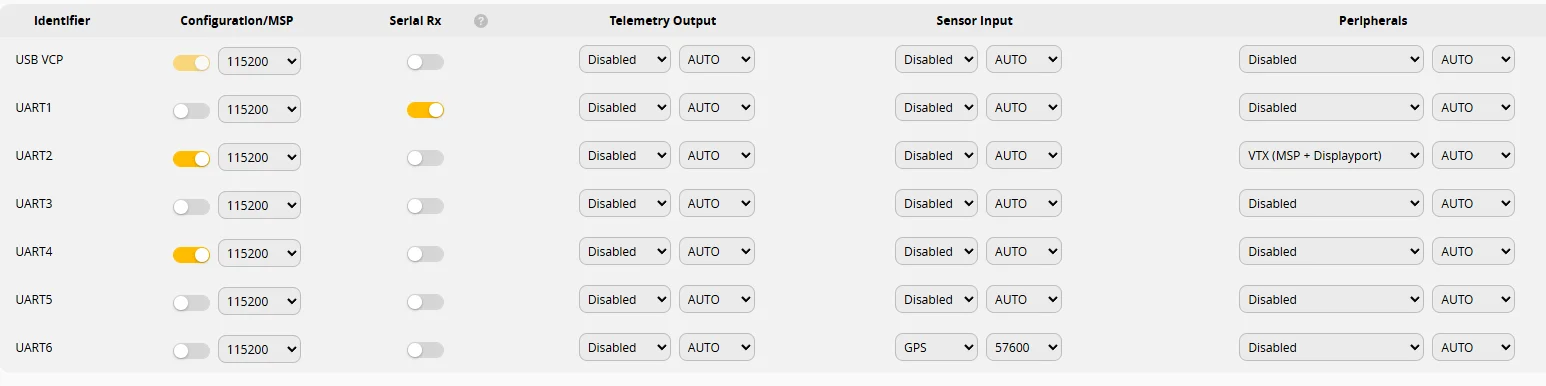
If your FC has no connector, solder RX/TX to TX/RX and power directly to ESC — cameras have internal BECs on board.
- Take an Ethernet RJ-45 cable and connect one end to your laptop or home router, the other end to the Air Unit.
- If using a router, open the router's web interface and find the IP address of your Air Unit.
- Download to your PC — Multiconfigurator.
- Connect to the Air Unit using its IP and password
12345.
- Set TX Power (max 50, min 1). Do not set 50 on the bench — it will burn out! Enable STBC and LDPC. Set MCS 2 → Save.
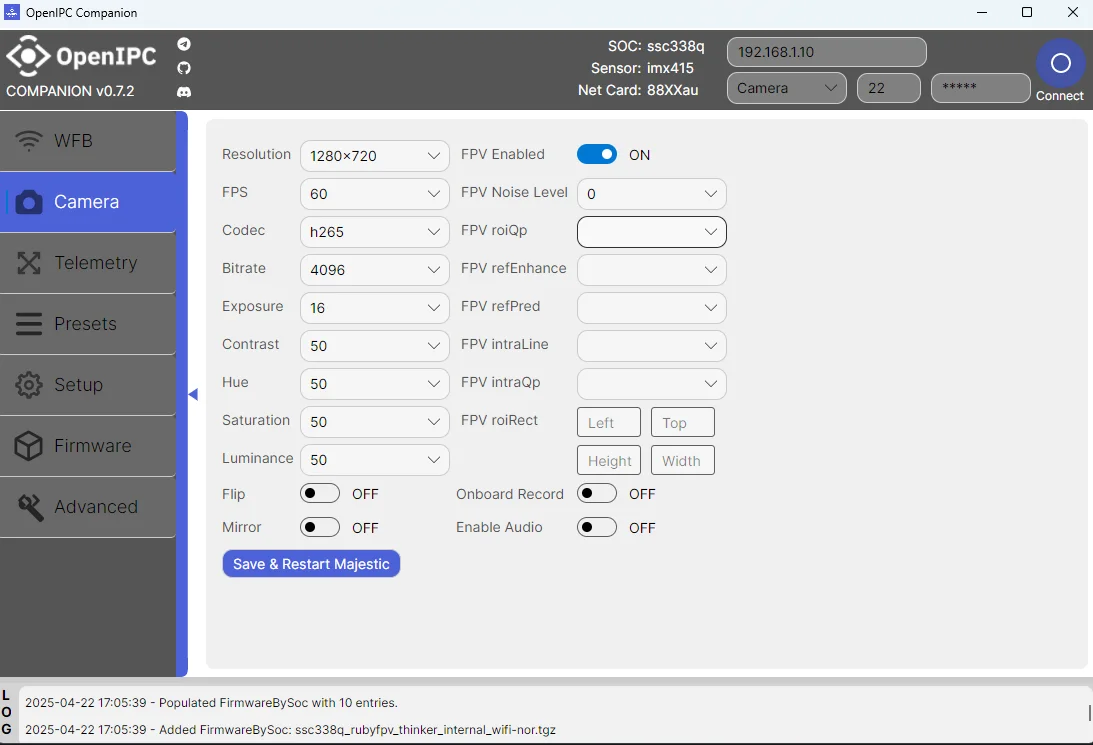
- Go to Camera → Bitrate → 8192 → Save. You can also adjust resolution (FullHD, HD) and FPS.
- Telemetry is configured via Betaflight.
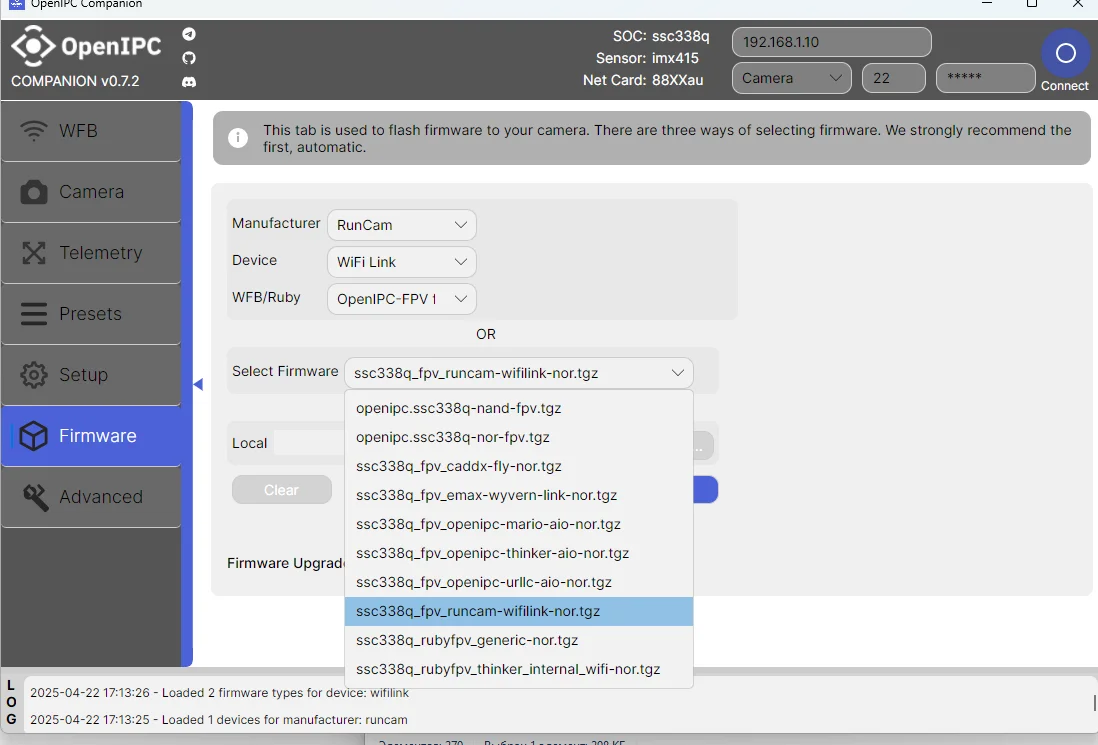
- To use new features or beta firmware, flash the camera here.
- Unofficial configurator by Mariofpv can be downloaded here.