OpenIPC Bonnet — expansion board for FPV and ground stations
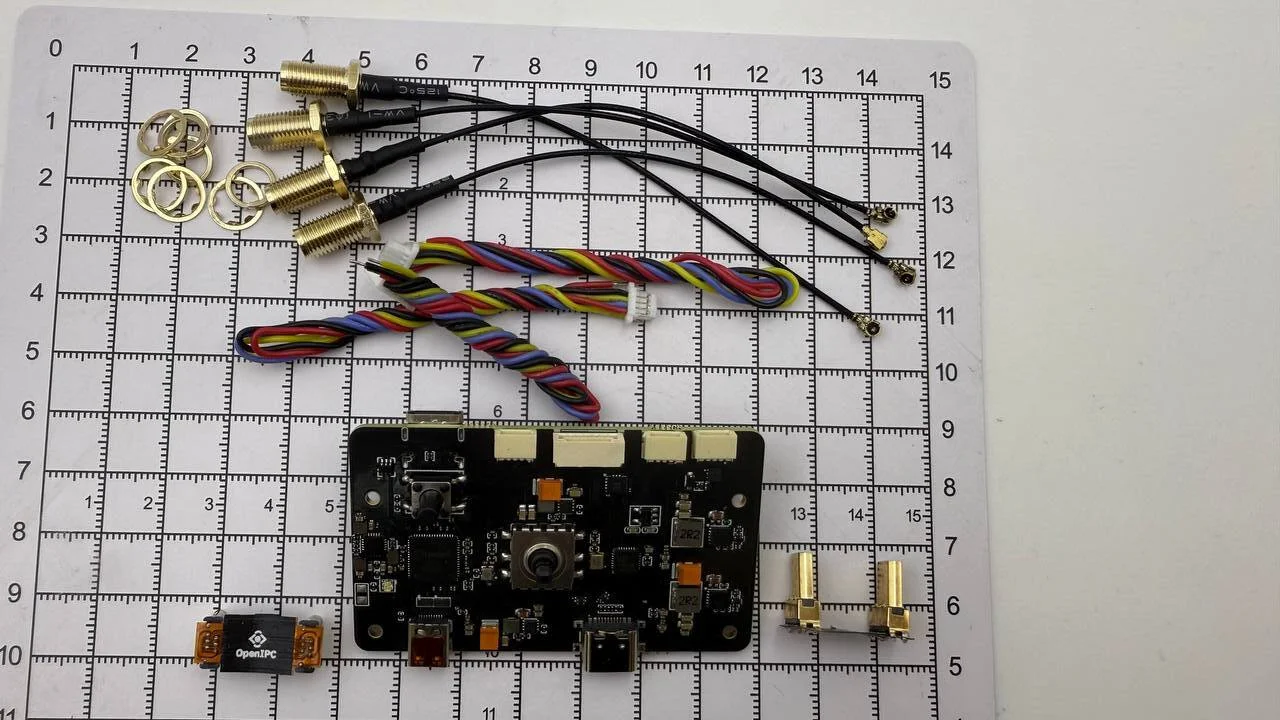 **OpenIPC Bonnet** is a compact expansion board designed to extend the capabilities of single-board computers such as the **Radxa Zero 3W**, used in FPV systems, repeaters and ground stations. It combines a USB hub, motion sensors, power management and communication interfaces specifically tailored to OpenIPC.
 Key features
- Wide power range: from 2S to 6S Li-ion / LiPo (high-efficiency bidirectional BEC).
- Power outputs:
- Regulated 5V and 3.3V rails
- Battery voltage monitoring
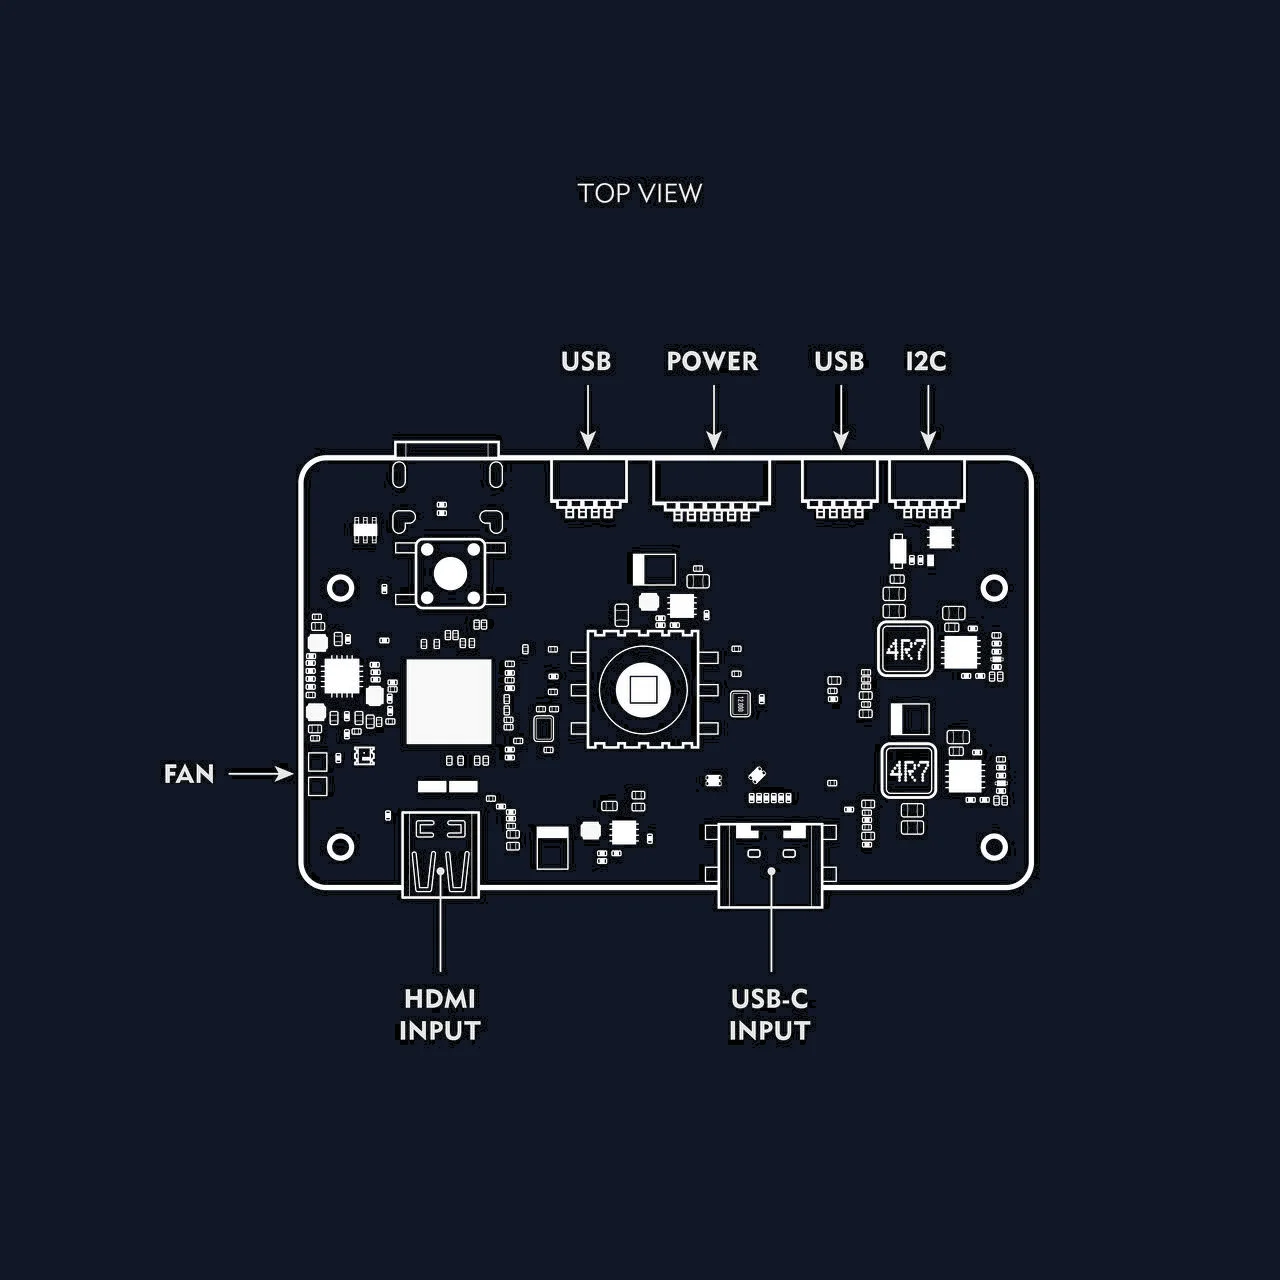
- USB hub: built-in 4-port USB 2.0 hub with reliable device detection
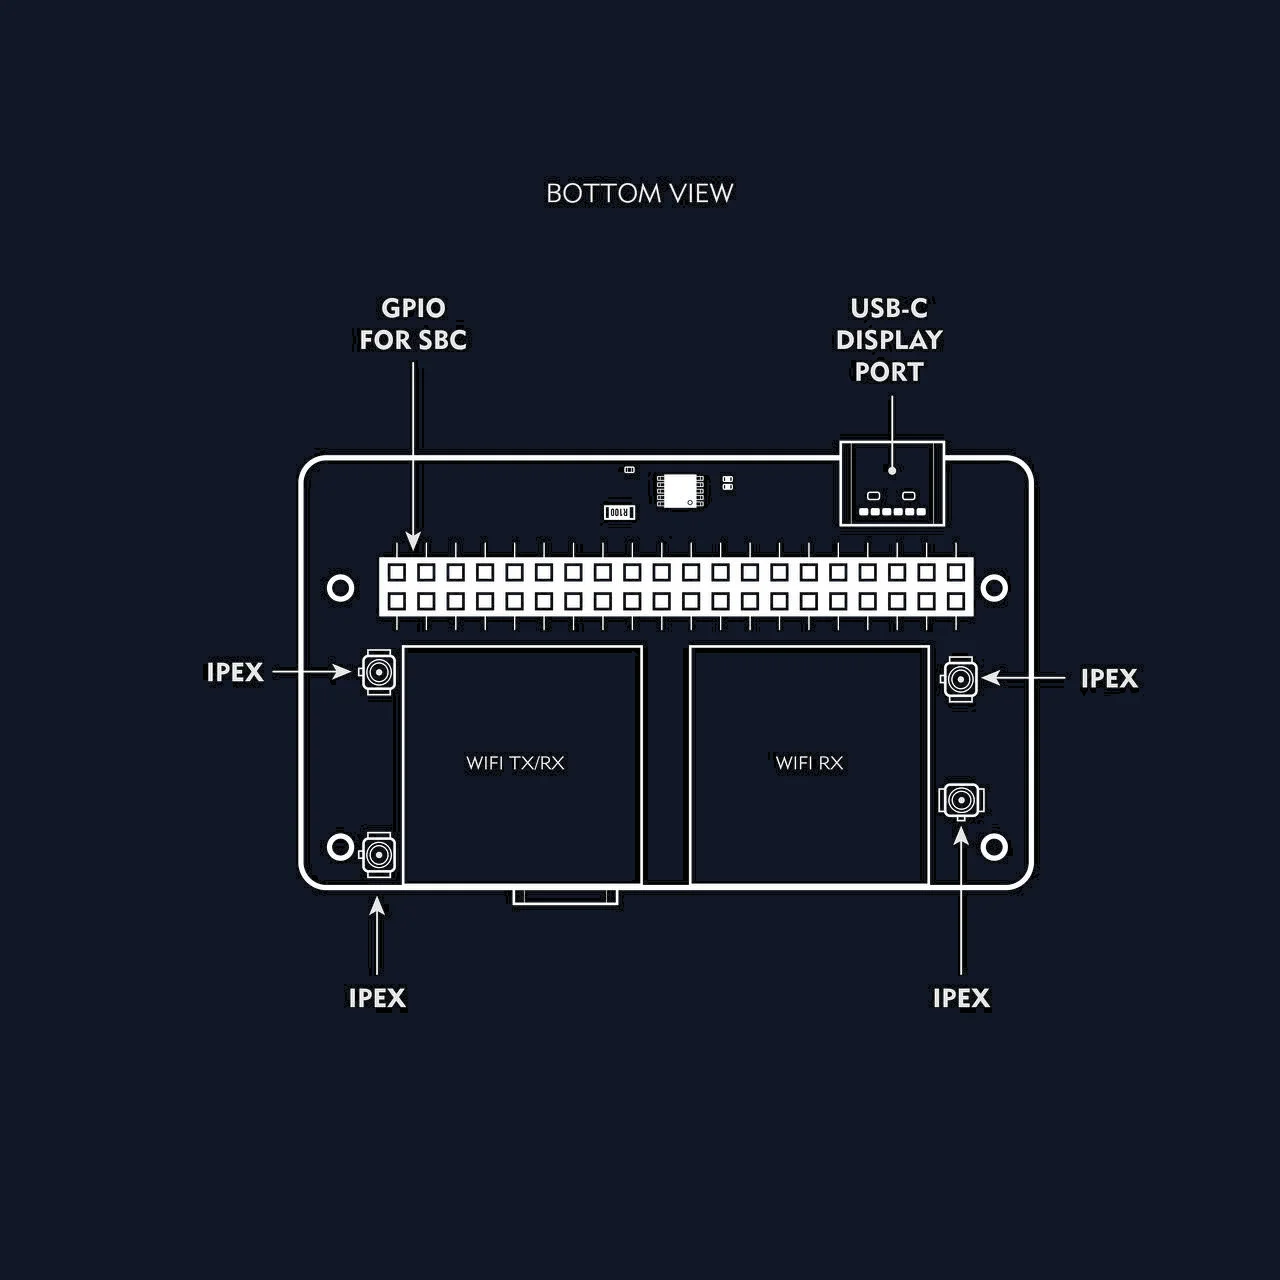
- Wireless modules:
- 2× RTL8812AU Wi-Fi modules with 4 FEM amplifiers for long range and throughput
- Video output:
- HDMI → DisplayPort adapter for connecting external low-latency displays
- User interface:
- 5-way joystick and a tact switch for UI / OSD interaction
- Sensors:
- 6-axis IMU (gyroscope + accelerometer)
- Expansion:
- UART and I2C connectors
- Compactness: optimized for drones, portable and field applications
 ---
--- Typical use cases
Portable VRX ground station
Build a mobile FPV station with a single-board computer (e.g. Radxa Zero 3W).Long-range repeater
Use the Bonnet in a rugged enclosure as a field repeater for control and video.Universal FPV transmitter
Build a radio with HDMI output, ELRS support and a touchscreen.VRX on FPV goggles
Pair it with FPV goggles (e.g. Meta Quest 3) to create a lightweight monitor with decoding.
Getting started
Connect the antennas
Always connect the 4 antennas (IPEX → SMA) before powering on.Connect to the SBC
Connect to the 40-pin GPIO connector of the single-board computer (e.g. Radxa Zero 3) via the dock USB cable.
INFO
This step is optional if you use the Bonnet with an Android smartphone or VR headset.
Insert a microSD
Use a memory card flashed with OpenIPC or RubyFPV firmware.Apply power
Connect a 2S–6S battery via the power wires (XT30 or XT60 is recommended — you'll need to solder the connector).
The Bonnet has reverse-polarity protection.
DisplayPort output
The Bonnet has a built-in HDMI → DisplayPort bridge. This allows you to connect external low-latency displays.
You need:
- A micro HDMI → micro HDMI cable or an appropriate adapter.
- A monitor with DisplayPort and EDID support.
Once connected correctly, video appears automatically during boot.
Software and drivers
- Wi-Fi: RTL8812AU support (already included in OpenIPC).
- IMU: connected over I2C, compatible with motion-tracking software.
- USB hub: supports most USB devices (including Wi-Fi adapters and flash drives).
GPIO button mappings
The 5-way joystick and the record button map to the following GPIO pins:
| Function | GPIO pin |
|---|---|
| Up | 16 |
| Down | 18 |
| Left | 12 |
| Right | 13 |
| Center (OK) | 11 |
| DVR record | 22 |
RubyFPV setup
The Bonnet is compatible with RubyFPV. To remap buttons, create a gpio.txt file in the root directory of the microSD card and specify the appropriate pins.