Runcam WiFiLink 2

Specifications
- Image Sensor: Sony IMX415
- Field of View (FOV): 160°
- Power Input: DC 9–22V (BEC recommended; direct LiPo connection not recommended)
- Lens Module Size: 19×19 mm (M12), MIPI cable 130 mm (proprietary)
- Mounting Hole Spacing: 25.5×25.5 mm
- Board Size: 30.6×33 mm
- Weight: 30 g (with fan) / 25 g (without fan)
- Antenna Connector: IPEX
- PA Output: 28 dBm (FCC), 20 dBm (CE) / 630 mW (FCC), 100 mW (CE)
- Wi-Fi Chip: Runcam custom RTL8812EU (5, 10, 20 MHz)
- UART: 1
- SoC: SigmaStar SSC338Q
- Firmware:
ssc338q_fpv_openipc_urllc_aio_nor.tgz(docs.openipc.org)
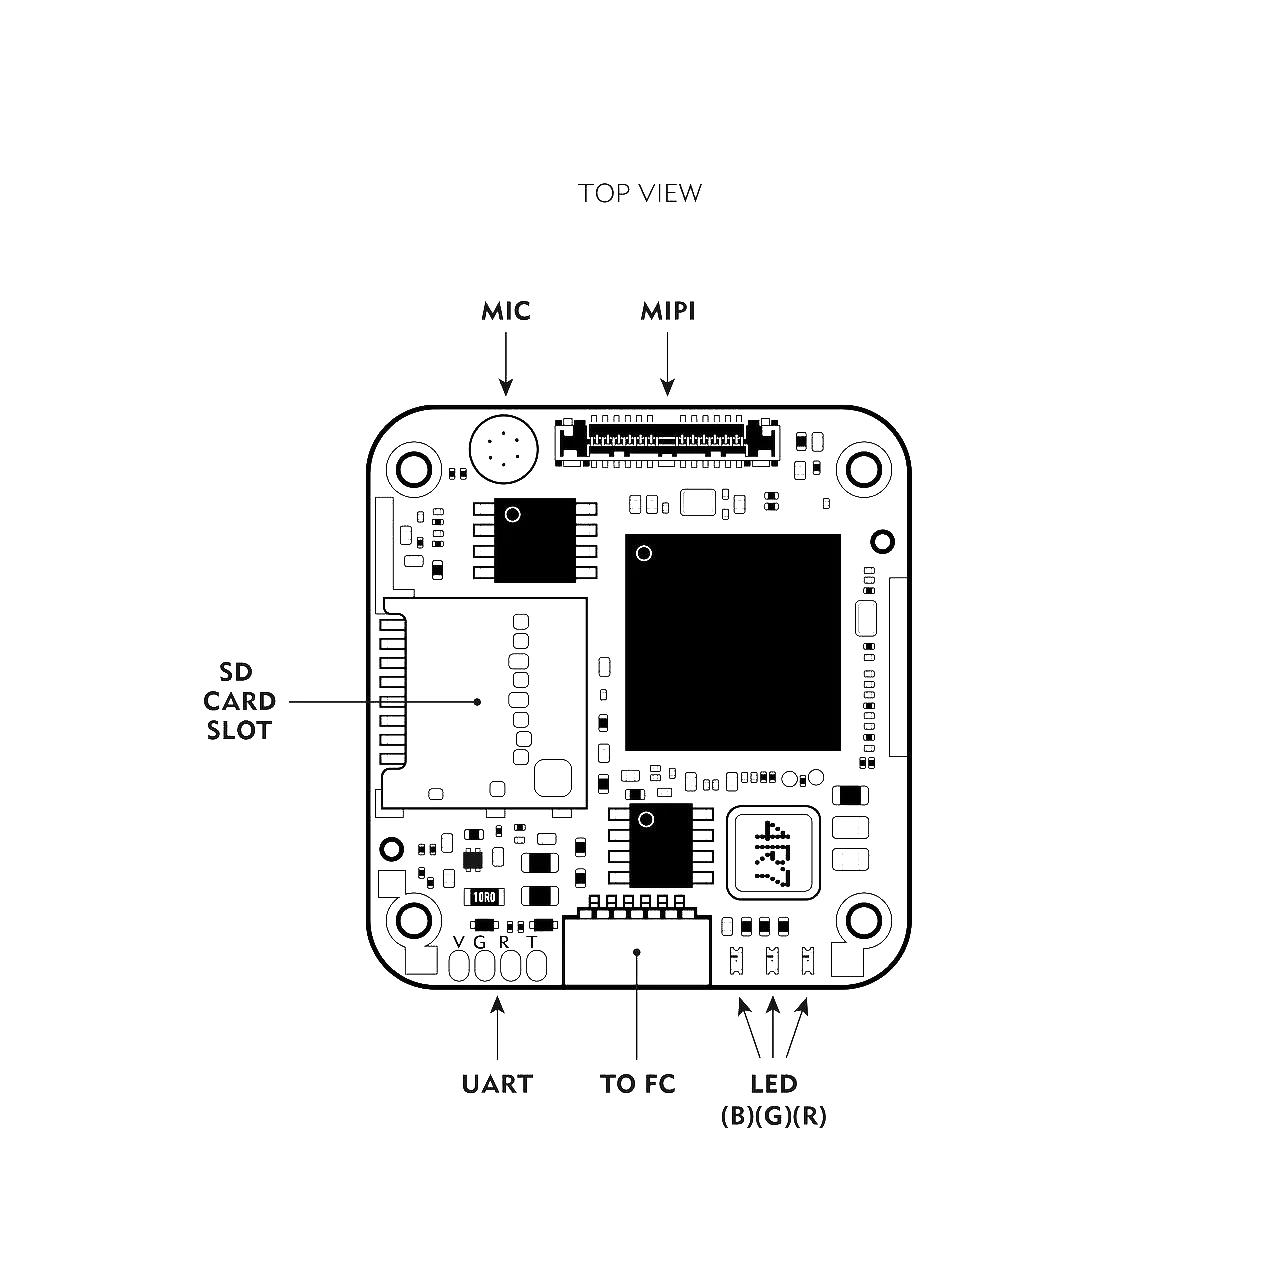
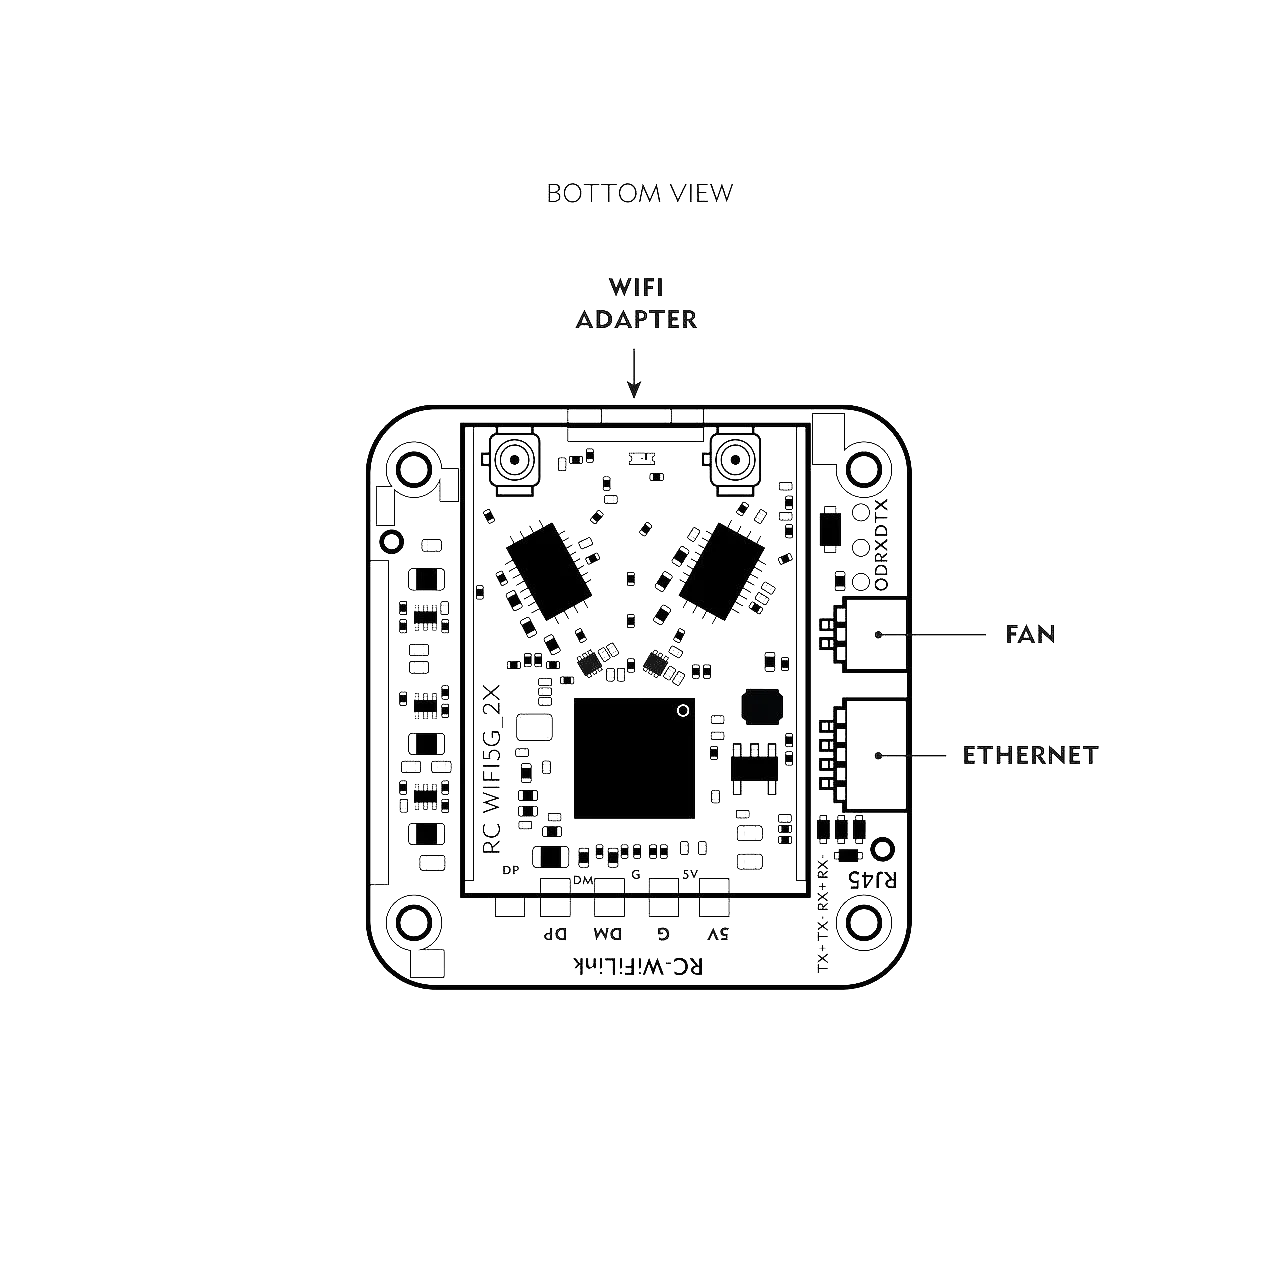
Board Layout
Basic Setup
Required Components
- Flight controller with Betaflight, INAV or Ardupilot firmware
- Runcam WiFiLink 2 and the PixelPilot app
- RTL8812AU Wi-Fi adapter (included with WiFiLink2-G)
- USB-C OTG adapter (included with WiFiLink2-G)
- Android 13 or 14 smartphone with a powerful CPU
- Internet connection (docs.openipc.org)
Hardware Connection
- Attach the antennas to the VTX.
- Connect the 4-pin cable to the UART on the FC (or solder directly), powering from the FC BEC; verify GND↔GND, VCC↔VCC.
- Insert a formatted microSD card into the slot on the bottom of the VTX (fan on top).
- Connect the included Ethernet cable to the device. (docs.openipc.org)
Getting the gs.key File
- Insert an empty, formatted microSD card into the VTX (contacts facing the board); disassemble the housing if needed.
- On first boot the device will create
userandgs.key; copygs.keyto your VRX (Android, PC, etc.). (docs.openipc.org)
Connecting to Android Ground Station
- Install PixelPilot.
- Copy
gs.keyto your Android device. - Connect the RTL8812AU Wi-Fi adapter to Android.
- Open PixelPilot via the pop-up.
- Tap the gear icon and set: Channel – 161; Bandwidth – 20.
- Add
gs.key: Gear → WFB-NG → gs.key → select the copied file. - Power on the VTX.
- If video does not appear within 30 seconds, restart PixelPilot. If the issue persists:
- Check the lens cap
- Verify
gs.key - Restart Android and the VTX (docs.openipc.org)
LED Status
| LED State | Meaning |
|---|---|
| Green off | Audio disabled |
| Green on | Audio enabled |
| Green fast blinking | Firmware update |
| Green slow blinking | Recording |
| Blue on | Booting |
| Blue fast blinking | Wi-Fi error |
| Blue and green alternating | Warning: overheating (> 90 °C) |
Summary
After basic setup you will have a modern digital FPV system, but without OSD. To configure OSD see the Advanced Settings guide. For manufacturer instructions see the official documentation.