Common Issues
How to Flash Runcam VRX Using an SD Card
This is a short guide on how to flash RunCam VRX using an SD card.
Step 1: Download the firmware image - Download from GitHub
Step 2: Write the image to the SD card
- Extract the archive with the image.
- Use Win32 Disk Imager to write the image to the SD card.
Step 3: Insert the memory card into RunCam VRX
- Insert the prepared SD card into the slot on the device.
- Connect the battery to the VRX.
Step 4: Activate the flashing process
- Push the "20/40 MHz" button once to the right on the joystick.
Step 5: Completion
- Wait until the flashing is complete (the indicator will stop or the device will reboot).
- Disconnect the battery.
- Remove the SD card.
⚠️ Attention: Do not turn off the power during flashing!
How to Recover Runcam VRX After a Failed Flash
If the internal memory (eMMC) was completely erased during a failed firmware flash, the VRX device may not even boot to the command line. But don’t worry — you can easily recover or “unlock” your VRX using this guide.
Step 1: Prepare the firmware
- Make sure you have the correct firmware image for your device (Ruby or SBC). It should be a regular image, NOT an
emmc_flasher. - SBC groundstation - latest releases
Step 2: Download required tools
- Download RKDevTool and the driver from Chipsee’s official website.
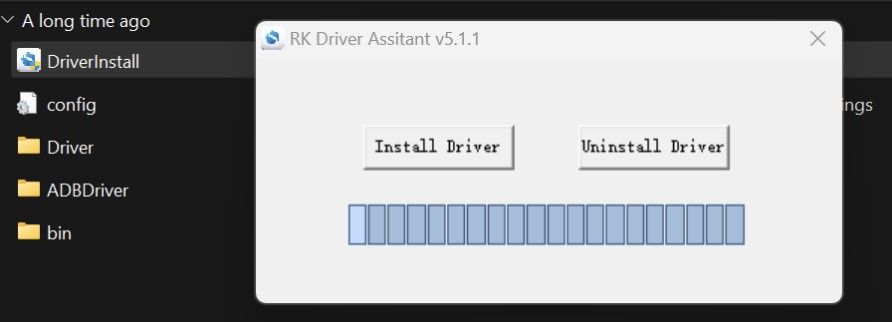
Step 3: Install the driver
- Before using RKDevTool, install the driver for the device.
Step 4: Configure RKDevTool
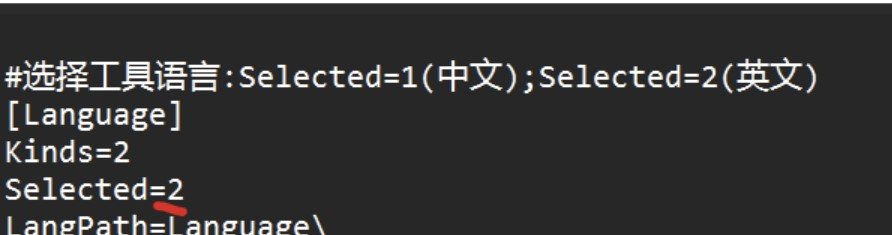
- Open the configuration file in the
RKDevTool_Release_v2.93folder. - Change
Selected=1toSelected=2to switch the interface language to English.
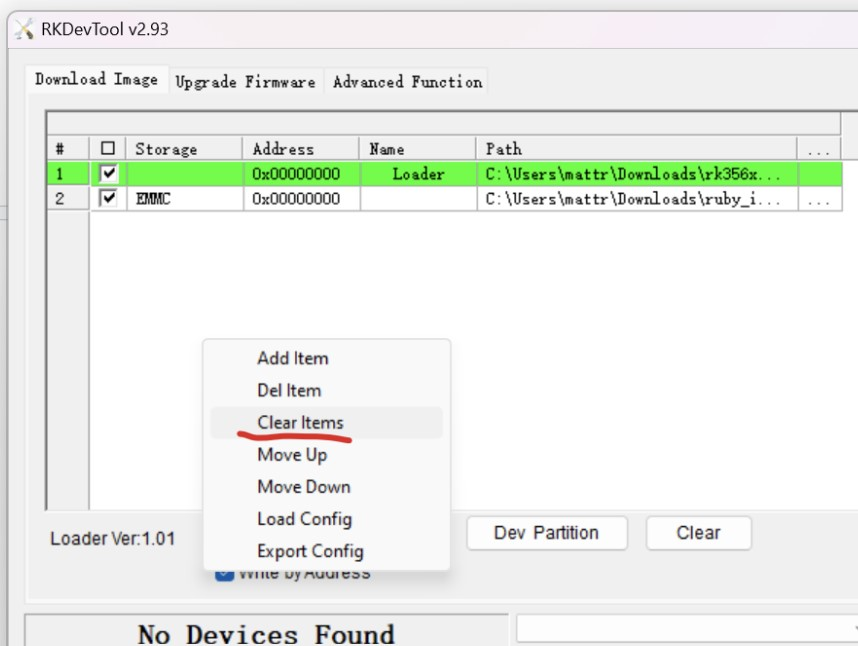
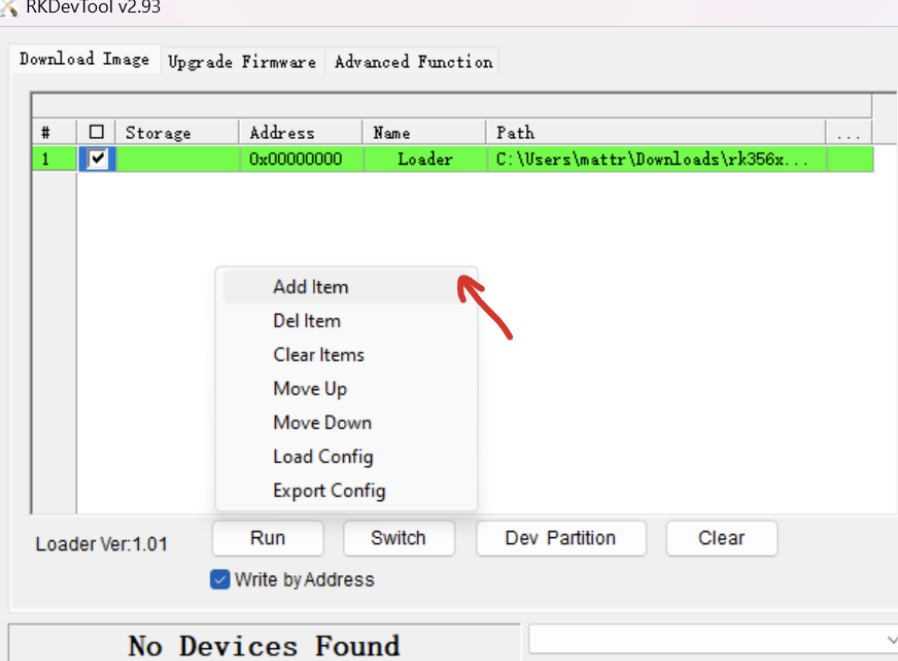
- Right-click in the program window and choose "Clear items" to clean the list.
Step 5: Add the loader
- Make sure the file name is
loader.
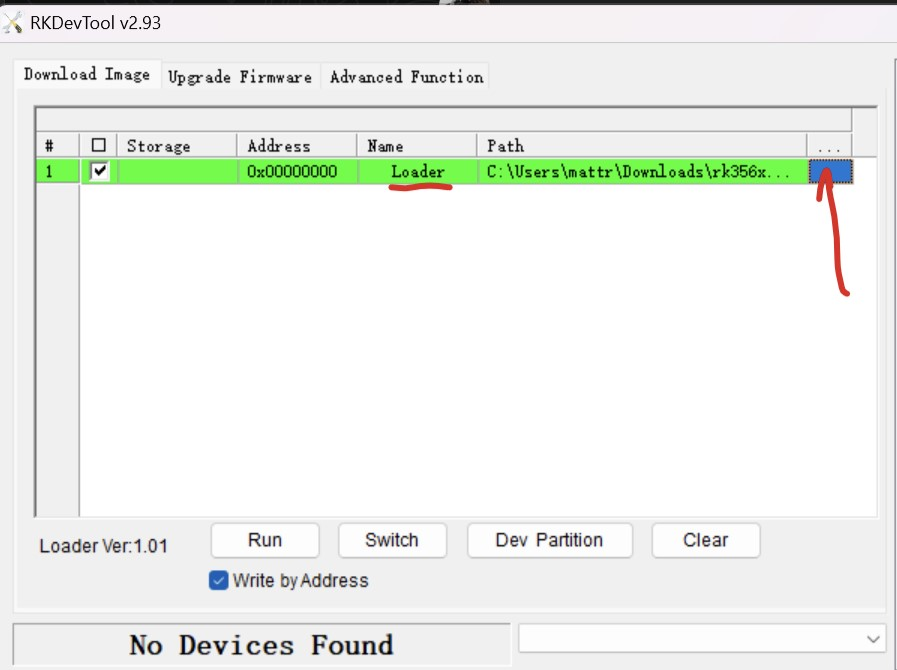
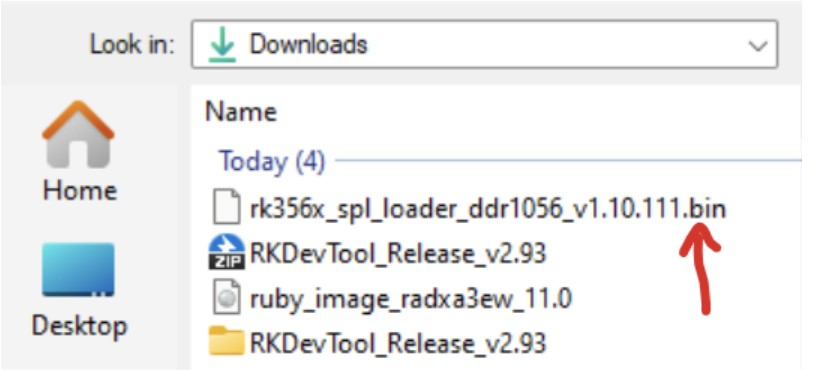
- Download the loader .bin file from the official Radxa website.
- Right-click in the program and select "Add item" to add the loader file.
Step 6: Add the firmware image
- Unzip the firmware image.
- Provide the path to your firmware image.
- Double-click on the
storagefield and chooseEMMC. - Make sure both items are checked, and that "write by address" is enabled.

Step 7: Switch the VRX to bootloader mode
- At the bottom of the device near the HDMI port, locate the small button.
- Press and hold it using a needle or paperclip.
- While holding, connect the power to the VRX, wait 2 seconds, then release the button.
- Connect the VRX to the PC via USB Type-C. The program should detect the device.

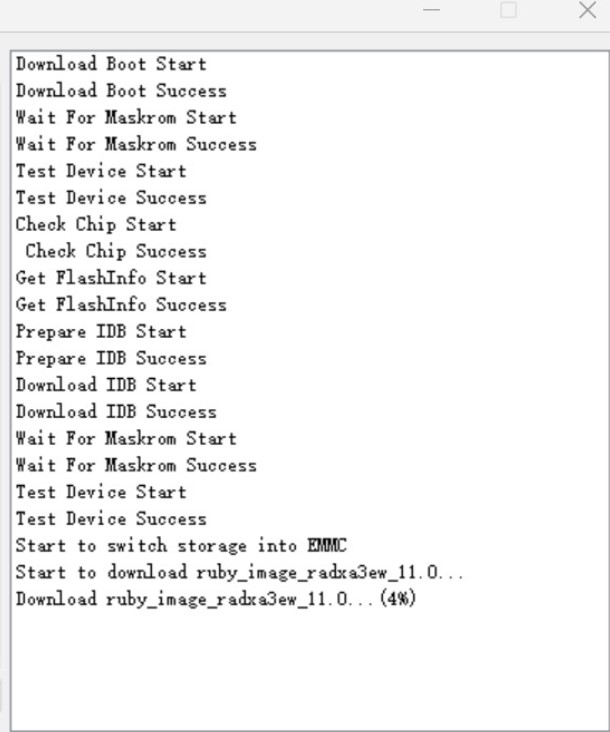
Step 8: Start flashing
- Click the "Run" button in RKDevTool.
- Wait until the process completes. Once done, a Download complete message will appear.
Step 9: Final Steps
- Turn off the power and disconnect VRX from the PC.
- Turn the device back on. VRX should now boot in normal mode.