Ground Station: Building Your Own Radxa Setup
When we talk about Radxa, it looks approximately like this:


Components for Radxa Zero 3W Ground Station
- Radxa Zero 3W (2 GB, no eMMC, with headers)
- Wi-Fi cards (2 units)
- RTL8812AU: compact, cheap, operates at 3.3V up to 40 MHz
- RTL8812EU2: more powerful, requires USB hub and 5V power
- BEC (voltage regulators): 5V and 3.3V adjustable
- USB hub: for multiple card connections
- Micro-USB → USB-C cable: for HAT
- microSD card: ≥ 64 GB (image ~1.5 GB + DVR ~1 GB/10 min)
- HDMI–mini HDMI cable or micro-HDMI→HDMI adapter
- 3D printed case (PETG)
- 25×25 mm fans
- Buttons/switches for DVR recording and AP mode
- XT60 (female) connector for power input
- 4 antennas (2 directional + 2 patch, LHCP or RHCP)
- RP-SMA extension/adapters
Power Supply
There are two powering options:
- Via Type-C (
Powon the diagram) - Via header pins — supplying 5V from the back, using Dupont cables
Assembly Notes
A little soldering won’t hurt 😉
Here’s how Ostap did it:
- Took an XT60 connector
- Wired power from it to each BEC separately
Power Wiring Diagram
Here's a rough sketch of the power scheme:

Case + USB Hub Options
🔸 Option 1
Internal setup using USB-HAT

🔸 Option 2
- No BECs needed for 8812EU2 Wi-Fi cards
- Just route USB + power to each card from USB hub
Examples of Assembled Ground Stations
- Option 1: USB-HAT + 2×RTL8812AU → 227 g without antennas


- Option 2: USB hub + 2×RTL8812EU → 105 g without antennas
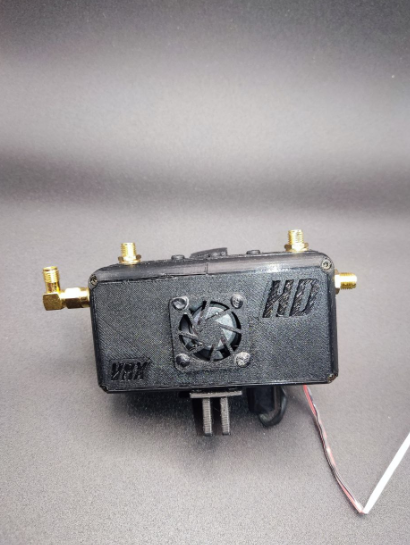

🔗 3D-printable case model available here
Wi-Fi Card Wiring
🟣 8812AU

🔵 8812EU2
